Arduino projects have been the cornerstone of electronics and programming. Among the wide variety of components that you can work with. One of the most outstanding is LED displays. They give a visual format to your data, turning projects into user-friendly systems. This guide dives into LED displays in Arduino.
What is a LED Display in Arduino Projects?
A LED display is a vital device used in arduino projects for data presentation. It comprises LEDs arranged in displaying numbers, letters, symbols, or patterns. In Arduino projects, a LED display usually acts as the interface between man and the device.
Important information in the LED display is conveying clear and effective information. For example, it might be displaying temperatures, counts, or messages in real time, without the need to connect external devices like a computer to monitor data. Most importantly, LED displays are lightweight and consume only very minimal power. Therefore, they fit numerous applications in various forms of LED types such as seven-segment, dot matrix, and RGB LEDs .
These displays add great value to projects. Whether you’re building a simple counter or a complex temperature monitor. A LED display enhances functionality by providing real-time, easy-to-read feedback.
Types of the LED displays in Arduino Projects
There are several types of LED displays used in Arduino projects, each with its own features and application. Understanding the types helps you choose the right display for your project.
The seven-segment display is one of the simplest and most popular types. It consists of seven individual LEDs arranged in the shape of a figure-eight. You can control each segment individually to display numbers or certain letters. 7-segment displays are applied in many various appliances, such as digital clocks, timers, and counters.
Dot matrix displays are one of the flexible ways to depict characters, symbols and even animation. It is composed of concurring sets of row and column LEDs. You can achieve scrolling text, custom patterns, and even small animations by switching on or off specific LEDs. They are generally used in various electronic billboards and nameplates.
RGB LED displays these can create colors by mixing red, green, and blue light. They are ideal for projects requiring colorful visual output, such as mood lights or notification systems.
Liquid crystal displays (LCDs) are not LED displays but are often categorized together in Arduino projects. They use liquid crystals to display information and, as such, are perfect for projects with heavy text output, such as weather stations, smart devices, and detailed menus.
Materials Needed
To set up an LED display with Arduino, several components are required. Here is a detailed list:
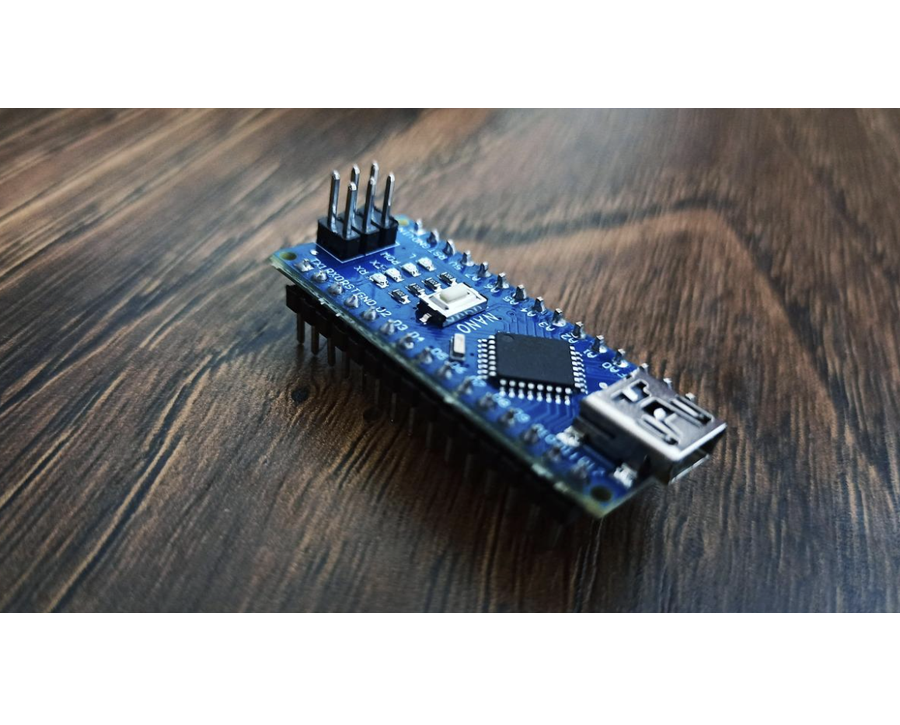
- Arduino Board: This is the heart of your project. Currently popular boards such as Arduino Uno, Mega, or Nano are quite suitable, but it all depends on the purpose of the project.
- LED Display: Select the type of the display you think should be used in your project; for example seven-segment, dot matrix, RGB or an LCD display.
- Resistors: These will regulate the amount of current passing through the LEDs and thus protect the bulbs from being blown. Use appropriate values according to your display specifications.
- Jumper Wires: Connect components on the breadboard and ensure stable electrical connections.
- Breadboard: For soting components in your circuit if you dont fancy soldering.
- Power Supply: The majority of the Arduino boards are powered through USB connector. But if your project requires more power. You can use an external adapter.
Having the right materials ensures smooth setup and operation. Make sure to double-check component compatibility before starting your project.
How to Connect LED Display to an Arduino Setup
Care and caution should be practiced while connecting an LED display to an Arduino setup. The following are the steps that one should consider in connecting:
- Prepare The Arduino Board
Ensure your Arduino board is functional and has no preloaded sketches that may interfere with the new project.
- Connect The Power Supply
Screw the connected end of the positive power supply to the 5V pin of the Arduino and the negative terminal to the GND of the module. Thus, the board and all other parts associated with it are supplied with power in some way or the other.
- Seven-Segment Display Wiring
Identify the seven-segment display pins. In case of doubt, the datasheet will tell which pin controls which segment. Jumper wires are used in connecting each segment pin to each digital pin on Arduino. Insert a resistor in between each segment and corresponding Arduino pin to limit the flow of current. Connect the common cathode or anode pin to the ground or power based on the type of display.
- Dot Matrix Display Connection
Identify the row and column pins on the dot matrix display. Use Shift registers if you need more pins than provided by arduino. Connect the rows and the columns to the Arduino via the shift registers or directly if enough pins are available. Insert current-limiting resistors to protect the LEDs.
- Hooking Up An LCD Display
Parallel interface-data pins connect to multiple Arduino digital pins according to the specification in the datasheet.
Supply power and ground.
- Verify the Connections
Check all the connections for any loose wires or incorrect placements.
Use a multimeter for checking continuity if needed.
- Upload Your Code
Write and upload the corresponding sketch to initialize and control the display.
Test the setup to make sure the display works as expected.
These steps will lead to the successful connection of your LED display with Arduino.
Applications of LED Displays with Arduino
LED displays open up a whole new avenue for Arduino projects. A few of the basic applications include:
- Digital Clock: You will also have the chance to show hours, minutes and seconds with such numeric seven-segment displays. Accuracy of the abovementioned is further improved with the inclusion of a Real-Time Clock (RTC) module.
- Counters: Construct counters for monitoring scores or people entering a venue, among others. Seven-segment displays are suited for this very purpose.
- Temperature Monitors: Combine a temperature sensor with an LED display to show real-time temperature readings. This setup is useful in weather stations, greenhouses, or home automation systems.
- DIY Games: Create interactive games where the LED display shows scores or game-related data. Dot matrix displays work well for these projects.
- Scrolling Text: Use dot matrix displays to create scrolling text or messages. This is perfect for electronic sign boards or badges.
- Ambient Lighting: RGB LED displays can represent ambient lighting that changes depending on inputs from the user or changes in conditions.
These examples show a wide range of uses for LED displays in Arduino projects.
How to Troubleshoot Arduino Projects with LED Display.
Troubleshooting in Arduino projects is an important skill. Common issues and their solutions include the following:
- Display Does Not Light Up
- Ensure that the power supply to the Arduino board and the display is enough.
- Make sure all connections are okay and check for loose and incorrect wiring.
- Incorrect Character or Pattern
- Check the wiring against the datasheet. Incorrect pin connections create display errors.
- Debug the code to make sure that it is set up like the display.
- Incomplete Display Output
- Check the code for any delays or errors in data transfer.
- Ensure that no LEDs are faulty or unconnected.
- Flickering Display
- Tighten the loose connections on the breadboard or solder joints.
- The power supply should be appropriate and stable.
- Overheating LEDs
- Limit the current using resistors with the correct value.
- Operate LEDs at full brightness for as little time as possible.
By finding a solution to these issues, you will have your project up and running.
Optimal Usage of LED Display with Arduino
Here are some general tips to get the most from an LED display with an Arduino:
- Organized Wiring: Always plan the circuit so that the wires do not get on top of one another and possibly cause a short. A breadboard is a neat way to connect things.
- Code Optimizing: Use efficient code with minimal delays for quicker response times. Using libraries such as Adafruit GFX or LedControl will make life easier in programming.
- Power Management: Minimize brightness or introduce power-saving modes.
- Component Safety: Use appropriate resistors and avoid overdriving LEDs to prolong their lifespan.
- Regular Maintenance: Clean the display surface to remove dust and ensure clarity.
These practices enhance the durability and performance of your projects.
Conclusion
A LED display increases the functionality and interactivity of an Arduino project. This article covers all aspects: from choosing the right type, through connections, up to troubleshooting. Now it’s time to start experimenting and bring your ideas to life with LED displays combined with Arduino.

Enter the digital world with our advanced display technologies.


